Insert Interaction
You can quickly and easily add interactions to your presentation. Interactions
are often utilized for knowledge checks. Interactions
can also be useful just to enhance the presentation by making it more
engaging and interactive.
There are three types of interaction formats:
|
Interaction Type |
Description |
|
Choices |
Multiple choice and True/False questions. The
user's objective is to select the correct answer before time runs out.
If you
will be Tracking
Using Quiz Results in an LMS, you must choose Choices as your Interaction
type. |
|
Word Quiz |
Similar to a "hangman" format. The
user's objective is to reveal the hidden answer before running out of
time. The
user selects a letter by clicking on it. |
|
Sequence |
The user's objective is to arrange items in the correct sequence before
running out of time. |
An Interaction can have an unlimited number of questions. Once
you have created an interaction, an 'Interaction Placeholder' slide will
be inserted into your presentation containing all the questions of your
interaction. You
will be able to view your interaction after you have published your presentation.
To add an Interaction:
Select Articulate
from the PowerPoint menu bar.
Click Insert
Interaction.

You will be prompted to Add
a new interaction or Edit an existing
interaction. Select
Add a new interaction if you want
to create a new one. Click
OK. (If
you have already created an interaction, and want to edit it, choose Edit an Existing Interaction and then
select the interaction name from the
drop-down list.)
The Interactions
Wizard will display. There
are three steps in the Interactions Wizard:
Step 1 of 3 - Interactions Wizard
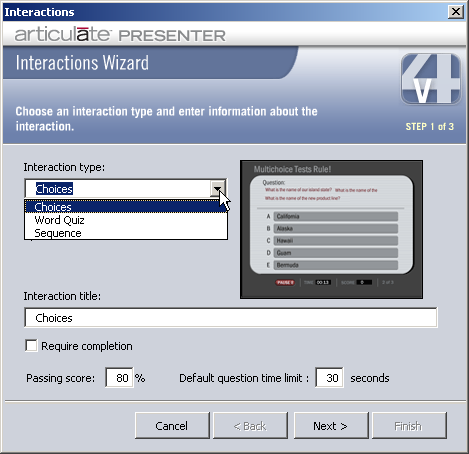
Select
an interaction type from the drop-down
list.
Enter
a Title for the interaction. It
will be helpful later if you provide a unique title for each interaction.
Check or uncheck Require
completion. If
checked, users will be required to complete the interaction before they
can continue in the presentation.
Enter a Passing
score. 80%
is the default.
Enter a Default
question time limit for each question. The
time limit represents how long users will have to answer the question.
You can
override this value for any specific question.
Click Next.
Step 2 of 3 - Interactions Wizard
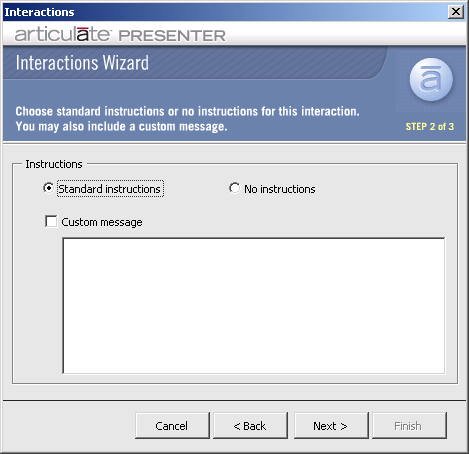
Choose to display the Standard
instructions or to display No
instructions.
Choose to display a Custom message. The
custom message can be displayed in conjunction with the standard instructions,
or without any instructions. If
you check Custom Message, be sure
to enter your message in the text box.
Click Next.
Step 3 of 3 - Interactions Wizard
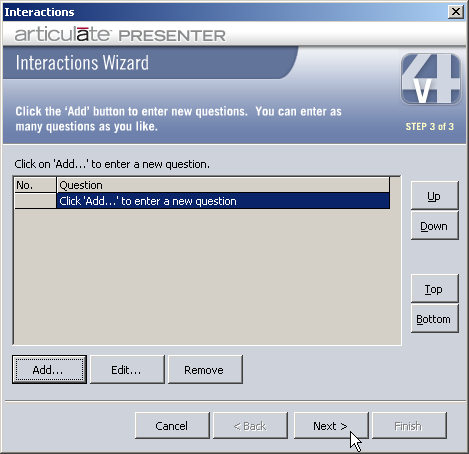
Click Add
to add a new question.
Fill in the questions and answers for the interaction
type you selected:
Choices
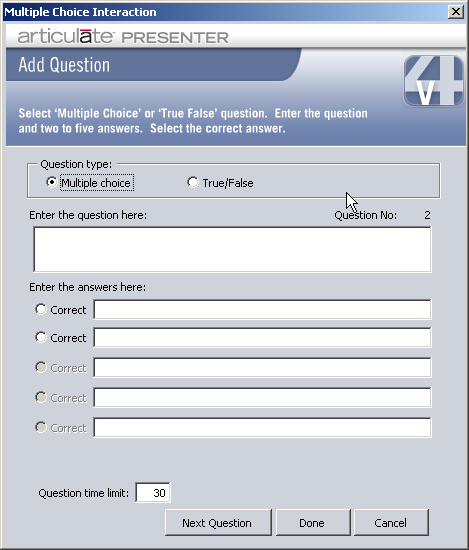
|
Select Multiple
Choice or True/False question
type. Enter the Question. Enter up to 5 Answers for Multiple Choice. Select the Correct answer. Enter the Question time limit value. Click Next
to add another question or click OK
to finish adding questions. |
Word
Quiz
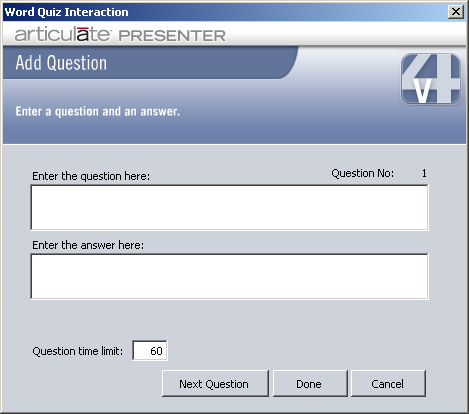
|
Enter the Question. Enter the Answer. Enter the Question time limit value. Click Next
to add another question or click OK
to finish adding questions. |
Sequence
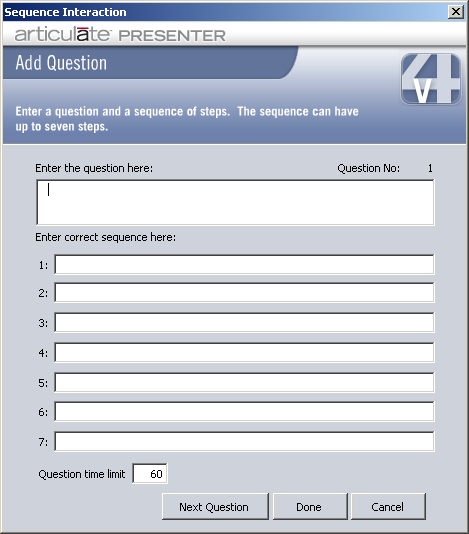
|
Enter a question. Enter the Sequence
in correct order. You
can enter up to 7 steps. Enter the Question time limit value. Click Next
to add another question or click OK
to finish adding questions. |
When you are done adding questions, you can edit a question by selecting
the question from the list and then clicking the Modify
button. You
can delete a question by selecting the question and then clicking the
Remove button. You
can also move a question by selecting the question and then clicking the
Up/Down/Top/Bottom buttons.
Interactions Wizard - Finish
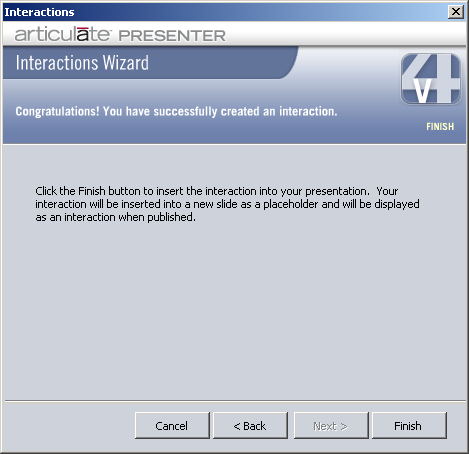
Click Finish
to insert the interaction into your presentation. An
interaction placeholder slide will be inserted into your presentation.
(This will
be converted to the interaction when your presentation is published.)
Make sure the interaction placeholder slide is
located in your presentation where you want it to be displayed in your
presentation. Switch
to Slide Sorter View to easily move it within your presentation.
 Tip:
You
can copy and paste your interaction slide into any other presentation.
Be sure
to copy the slide from Slide Sorter View so that the entire slide is copied,
and not just objects on the slide.
Tip:
You
can copy and paste your interaction slide into any other presentation.
Be sure
to copy the slide from Slide Sorter View so that the entire slide is copied,
and not just objects on the slide.